一、需求背景:
家庭网络为节约空间,电费等要一机多用,同时实现路由器、(旁路由)、windows、NAS(文件存储、黑群晖)等功能。
二、硬件环境
1、J4125 主机4个2.5G网口小主机一台
2、一个U盘8G以上
3、键盘、鼠标、显示器HDMI
三、软件
下载地址2:123PAN下载 提取码:Oiel
2、Downloads – Proxmox VE (推荐下载7.4比较稳定实验成功了)
下载地址2:123PAN下载 提取码:qmEX
四、制作启动盘
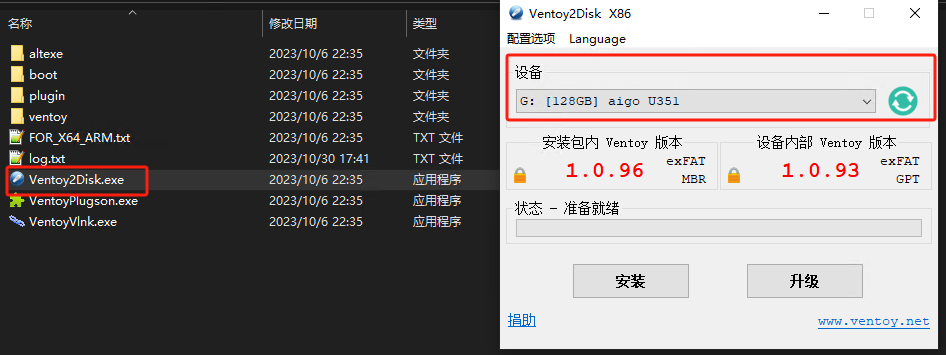
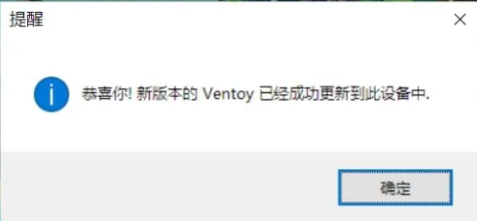
下载ventoy-1.0.96-windows.zip 解压打开Ventoy2Disk.exe选择你的U盘然后点安装。
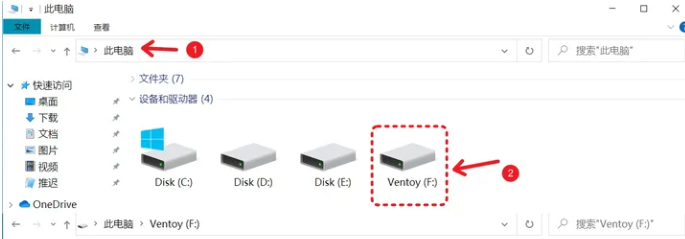
安装完成后将镜像proxmox-ve_7.4-1.iso 无需解压直接放到Ventoy分区中
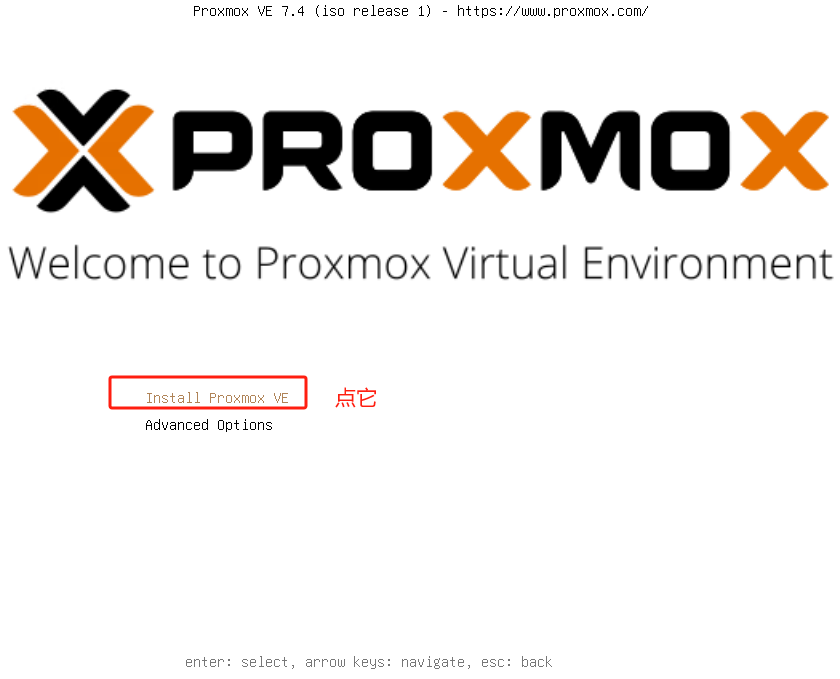
现在,当我用这个U盘引导系统启动后便可以选择这个系统镜像来安装系统了。日后更新系统只需替换这些镜像即可。
U盘插到小主机开机把引导首选改成U盘然后后启动会看到如下界面选proxmox-ve_7.4-1一路默认选项进入PVE安装
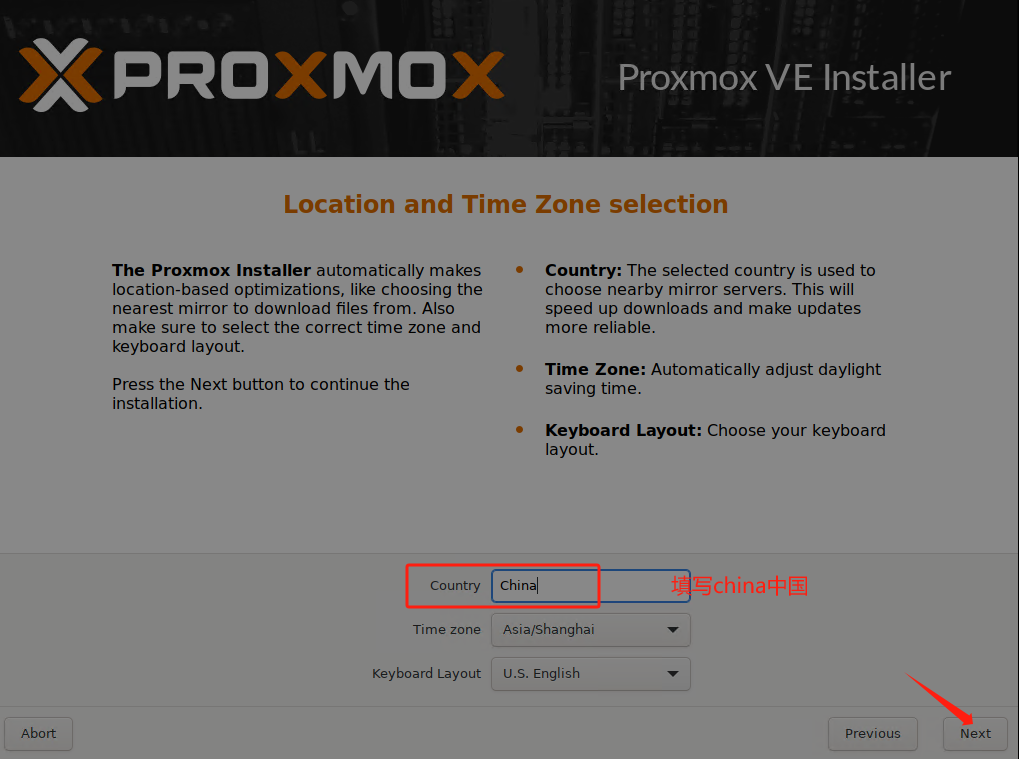
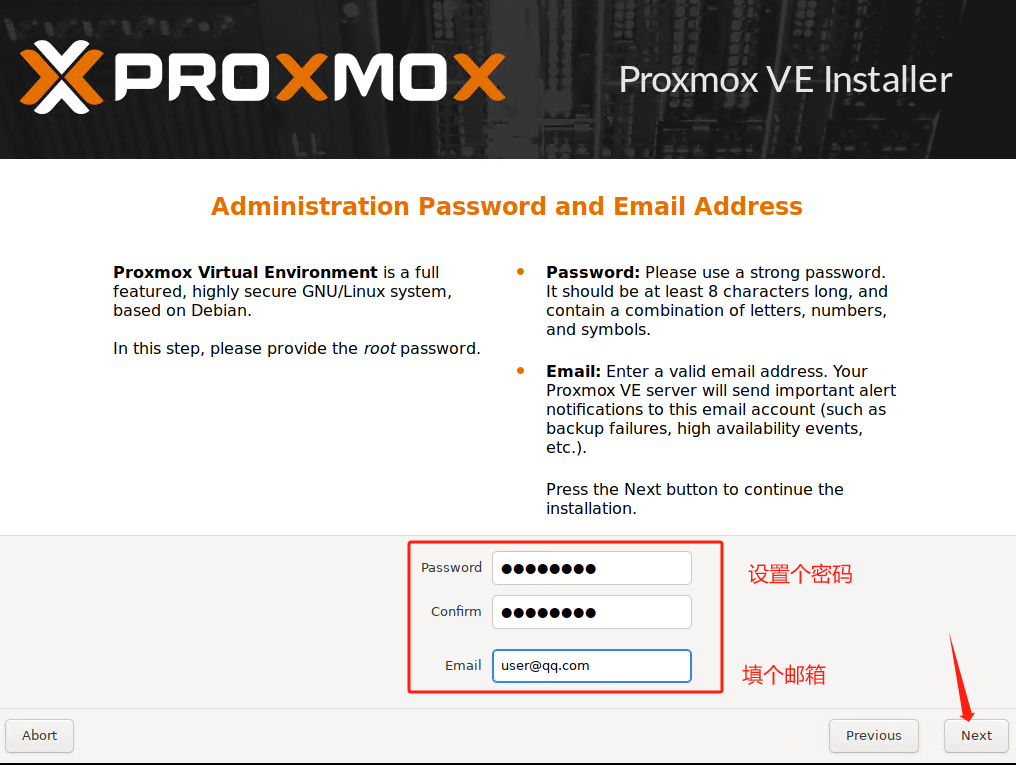
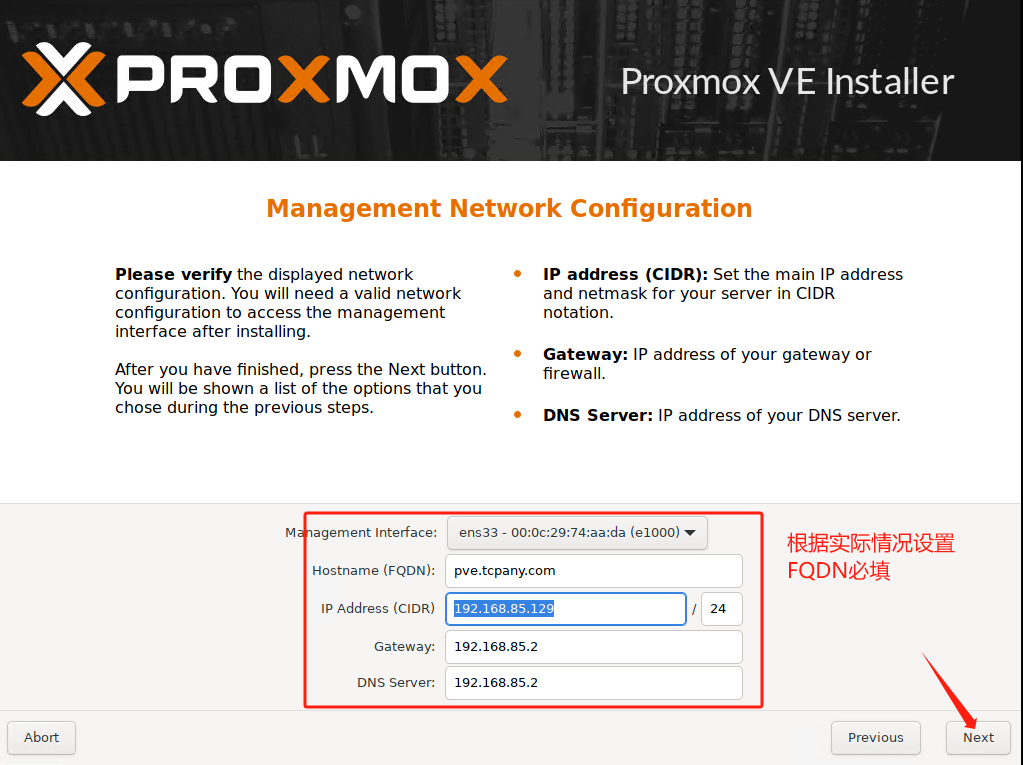
五、开始安装PVE

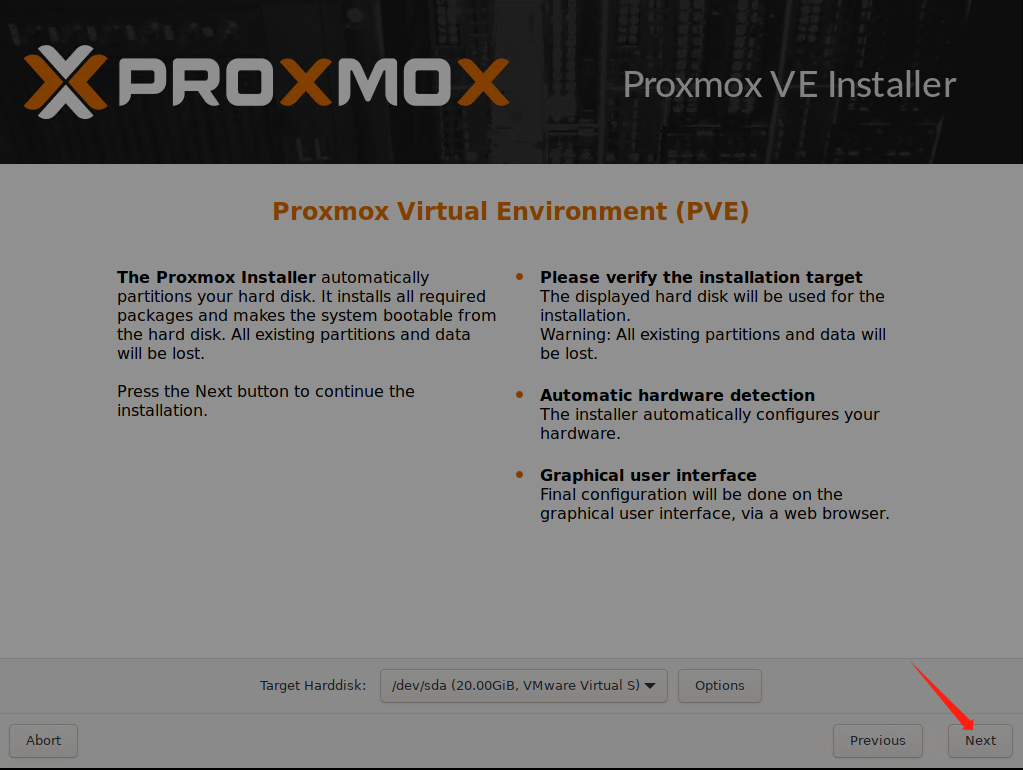
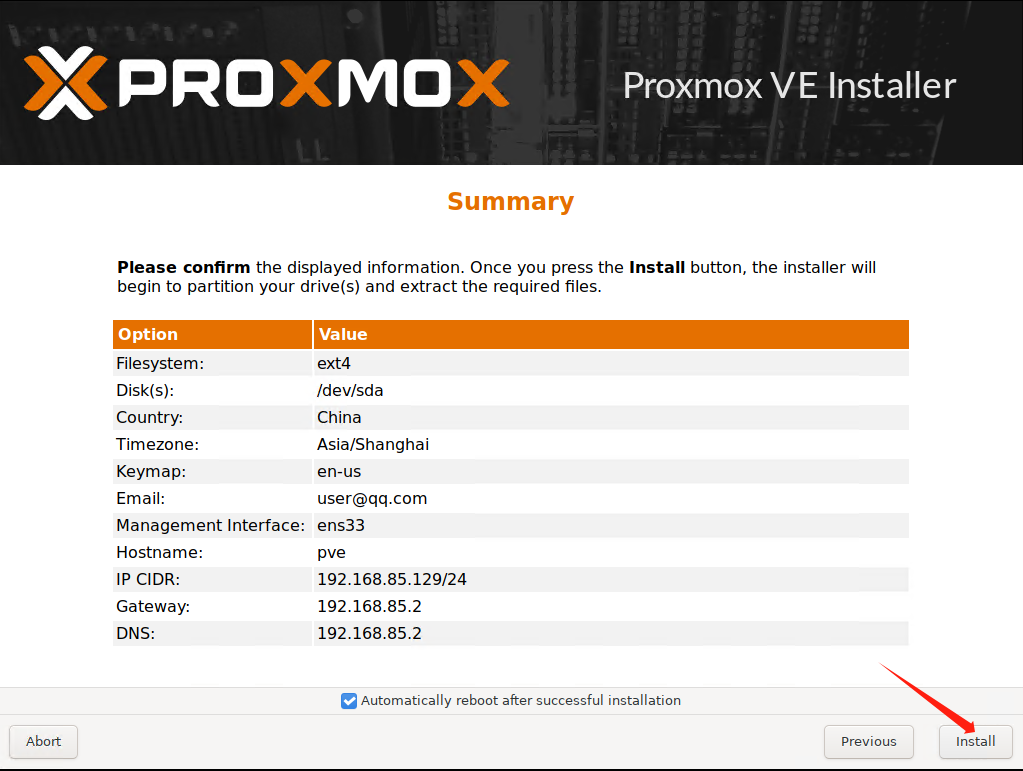
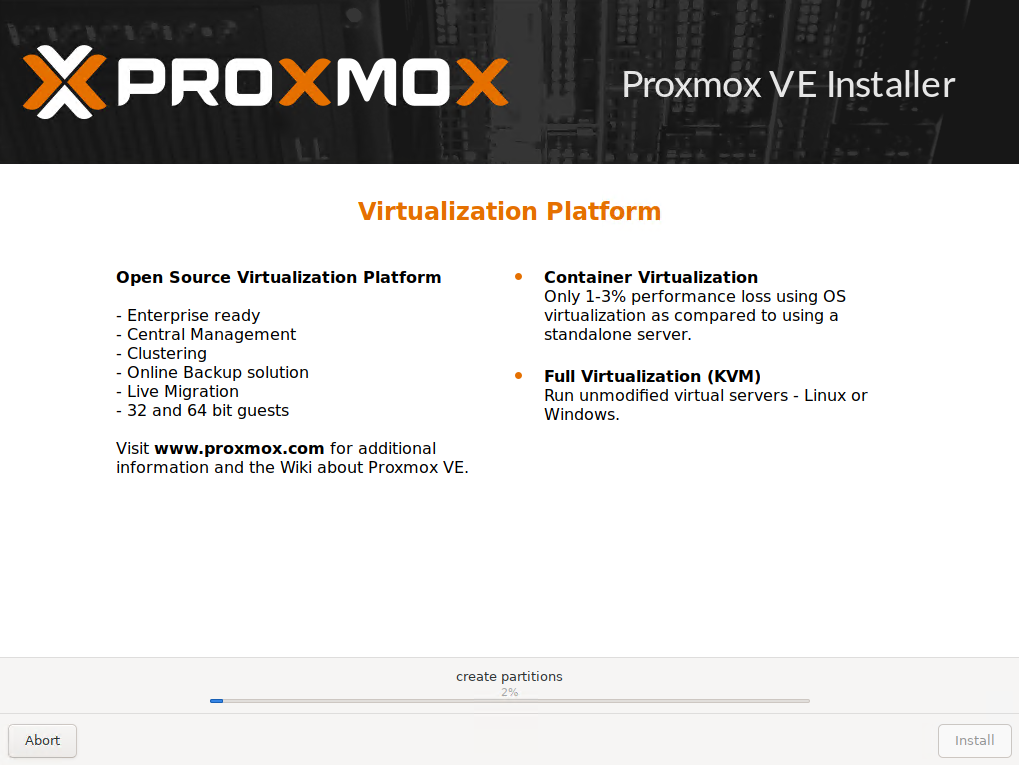
等待安装完成
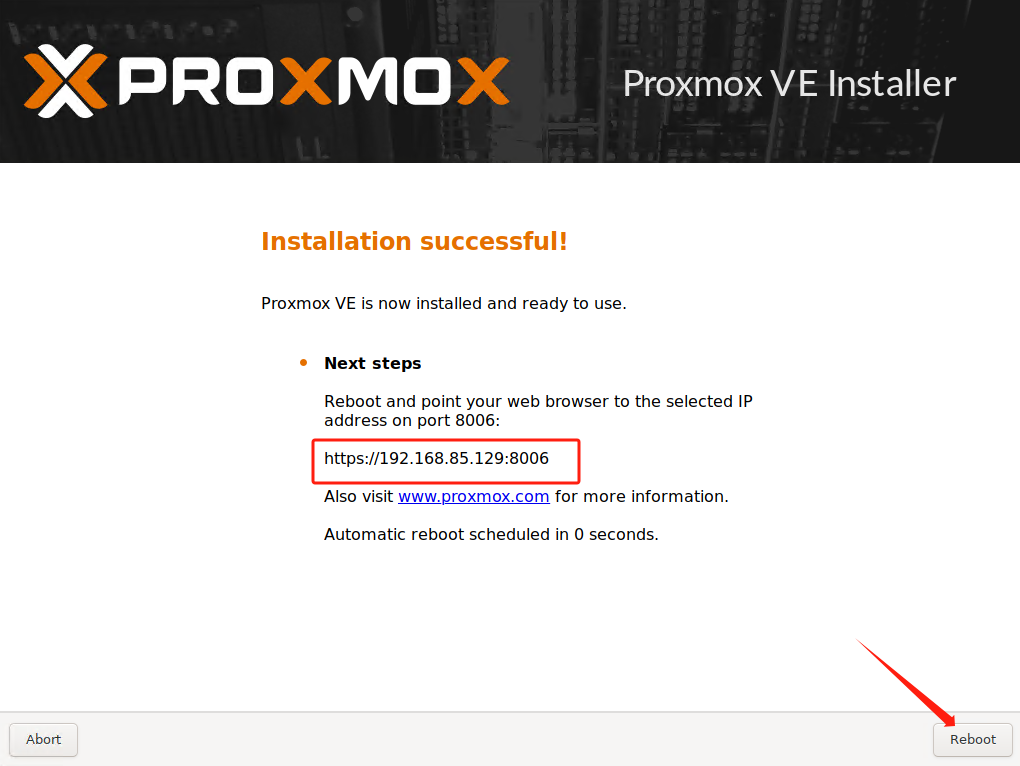
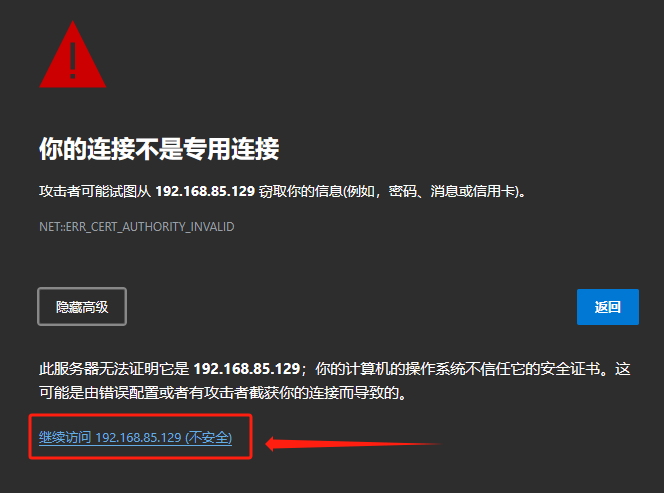
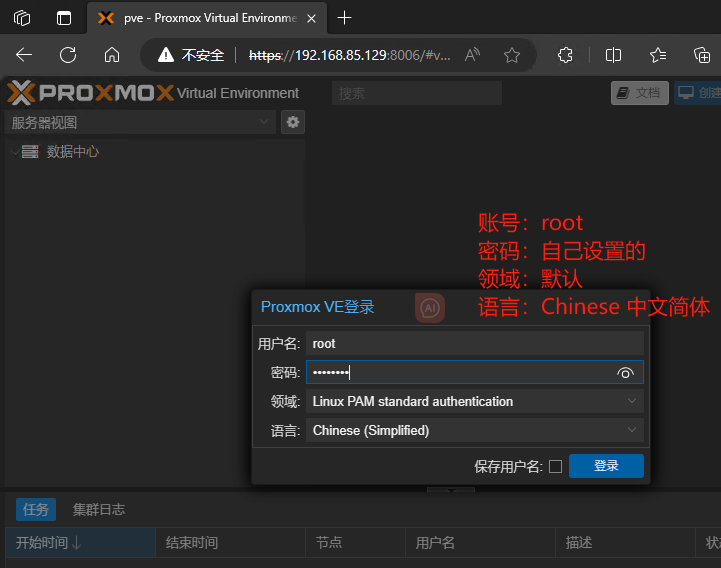
安装完成重启后访问https://192.168.85.129:8006 (IP地址为你自己设置的IP)
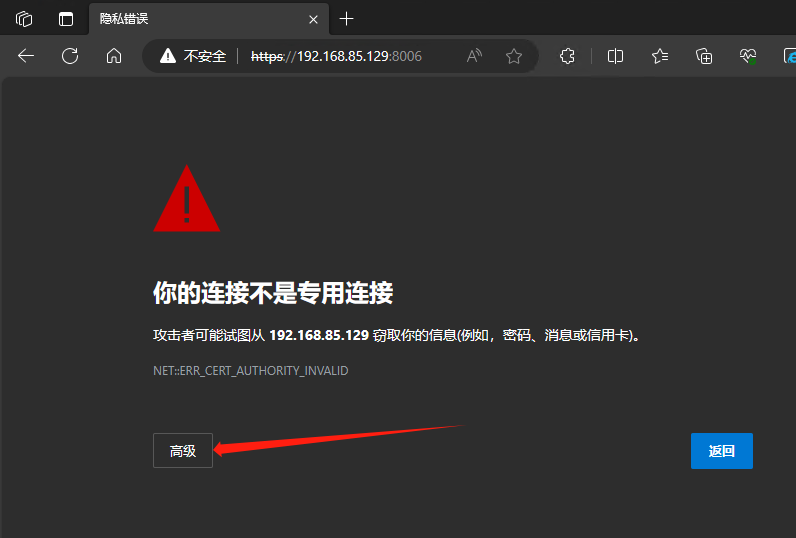
出现这个不影响点高级继续访问即可
 r
r
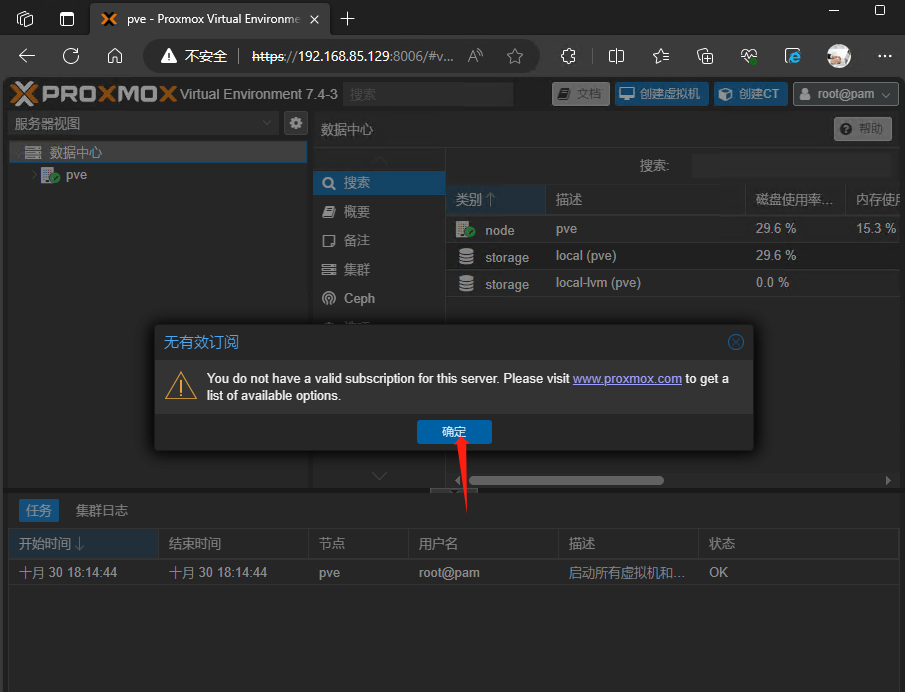
弹出的无效订阅不用管点确定即可。
第一节完成,后续更新计划
第二节 设置PVE网卡直通
第三节 PVE安装爱快
© 版权声明
文章版权归作者所有,未经允许请勿转载。
相关文章
暂无评论...


也期待此站做为每一位网络工程师爱好者常用的导航首页,内容还不够丰富欢迎大家提交自己认为有价值的网站,丰富网络工程师导航站的内容。